
Because of the heating requirements of the AP-640, media margins need to be increased between jobs to ensure proper drying.
Here are two methods that can be used to minimize the margins between jobs during printing.
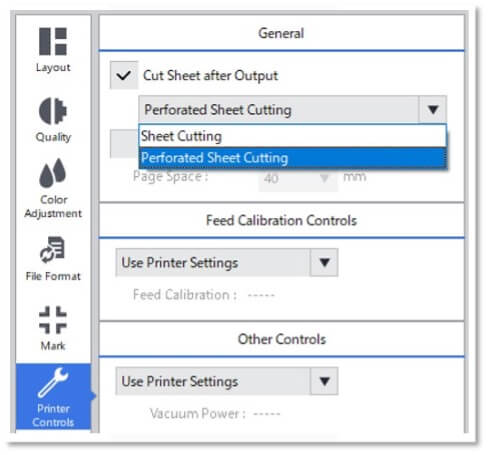
Method 1 – Perforated Sheet Cutting
If you select the Perforated Sheet Cutting control (see below), the operation of sending the media to the dryer after printing is eliminated, so the margins will be reduced.
Steps:
- Double Click on the job to open the Job Settings.
- Select Printer Controls > Cut Sheet after Output.
- Select – Perforated Sheet Cutting.
- Click OK.
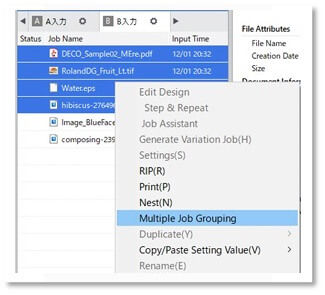
Method 2 – Job Grouping
If you group several jobs together and print them all at once, the need for margins between jobs is eliminated due to continuous printing.
Steps:
- While holding the Ctrl key down, select multiple jobs to be output at the same time.
- Right-click on the jobs and select “Multiple Job Grouping” (see below).
- Send the job group to the printer.
Notes:
- Jobs with different resolutions and paths can be combined, but the image quality and dry times might be affected.
- When “Cut Sheet after Output” is selected in the Job Settings, that function is enabled for only the last job in the group.
