
There are many applications where printing directly to an object is extremely difficult or even impossible. The Roland DGA Graphic Transfer System (GTS) makes it quick and easy to transfer vibrant, pre-printed UV graphics to irregularly shaped objects, such as those with uneven surfaces, corner rounding, and extended lips or edges, that can’t be direct-printed on.
In this Quick Tip I'd like to share a setup workflow that has enabled both Roland DGA and end users to achieve the best results. First let's talk about the system:
- VersaUV LEF2 Series UV Printer
- V-BOND Ink
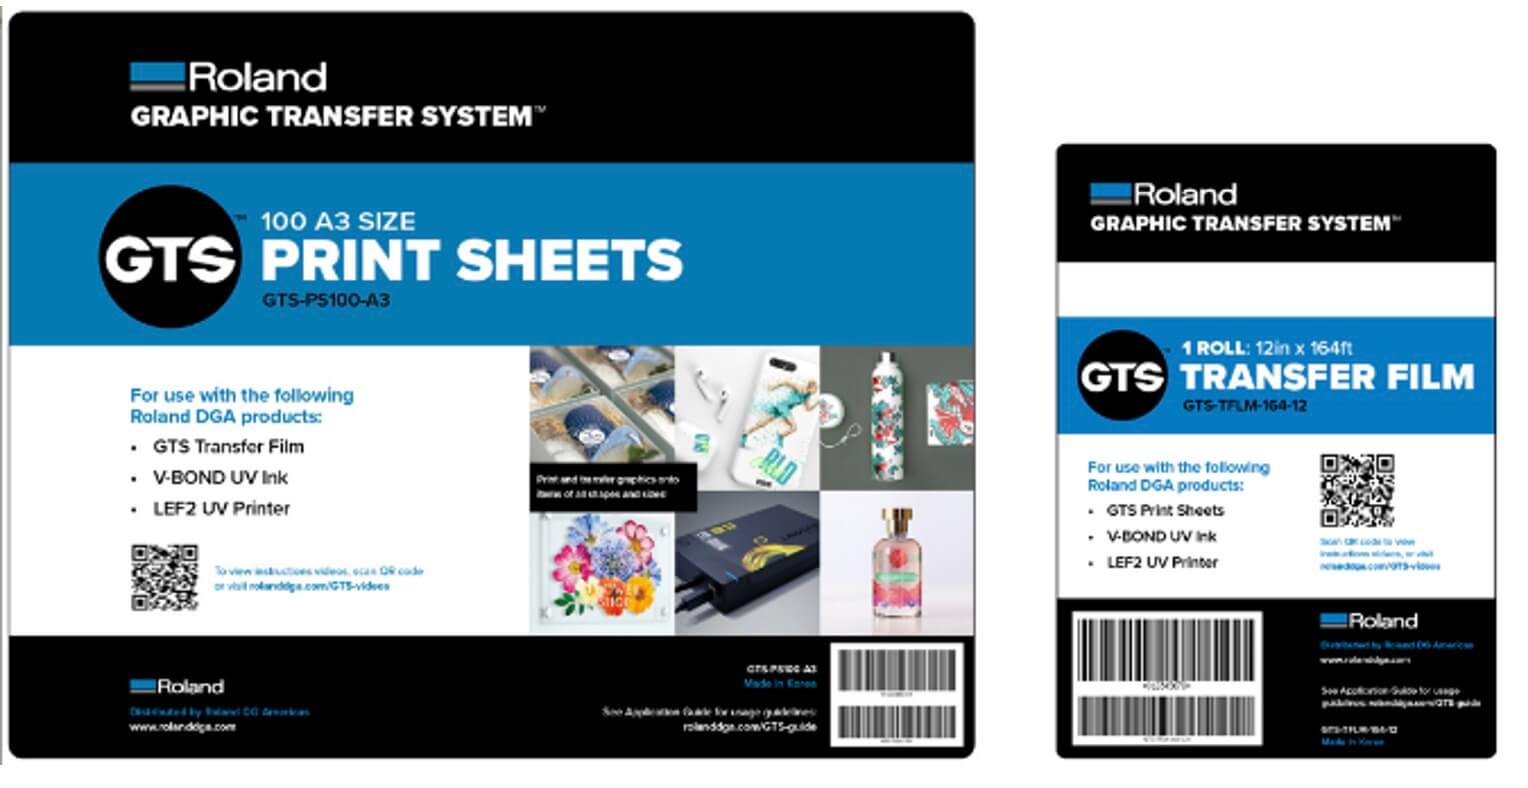
- GTS Media
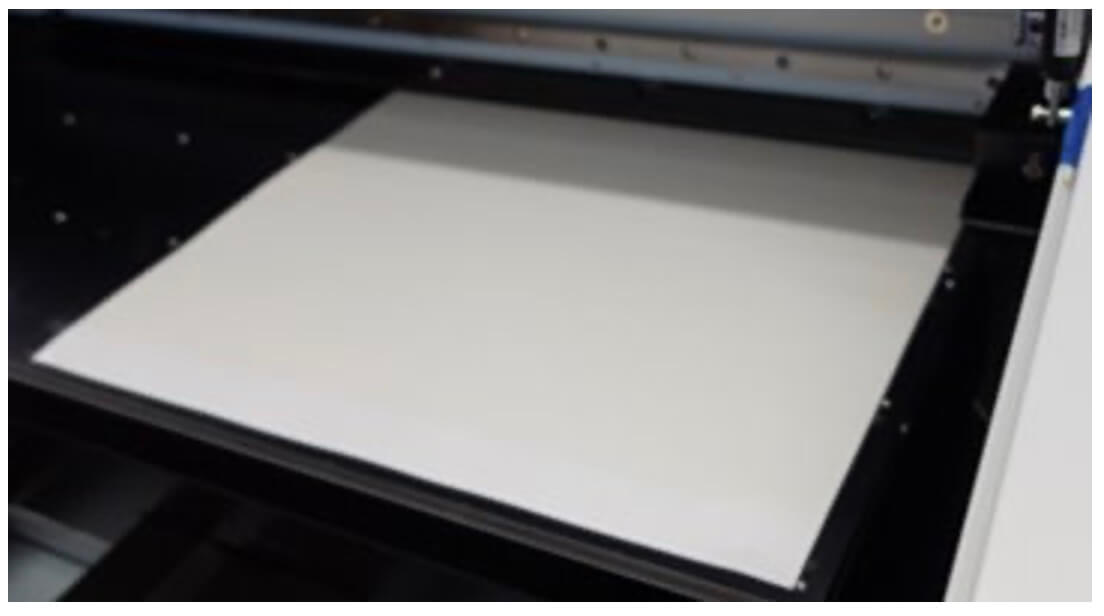
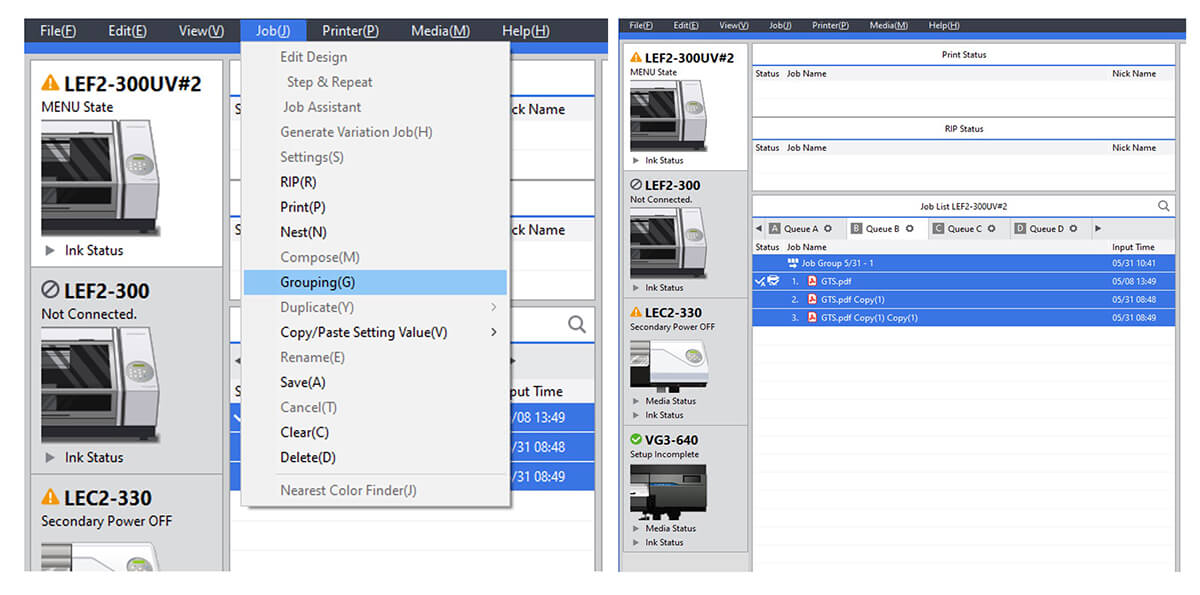
Step One: After loading your print media, and setting up your printer to print, load art into VersaWorks and follow the steps below:
- Import file
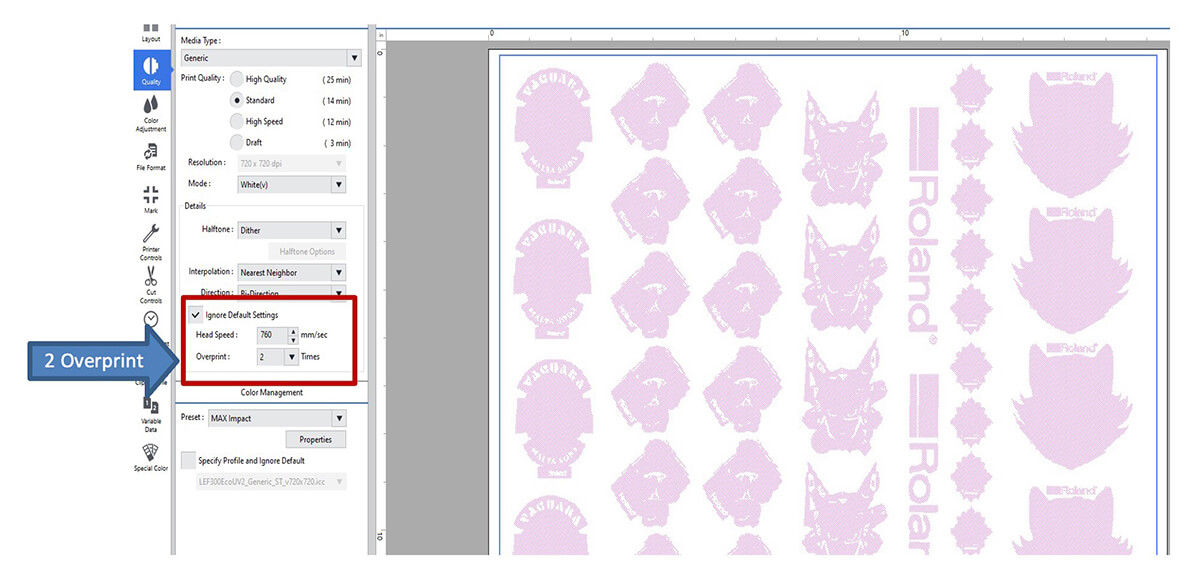
- Setup/ layout and quality settings-White (File 1)
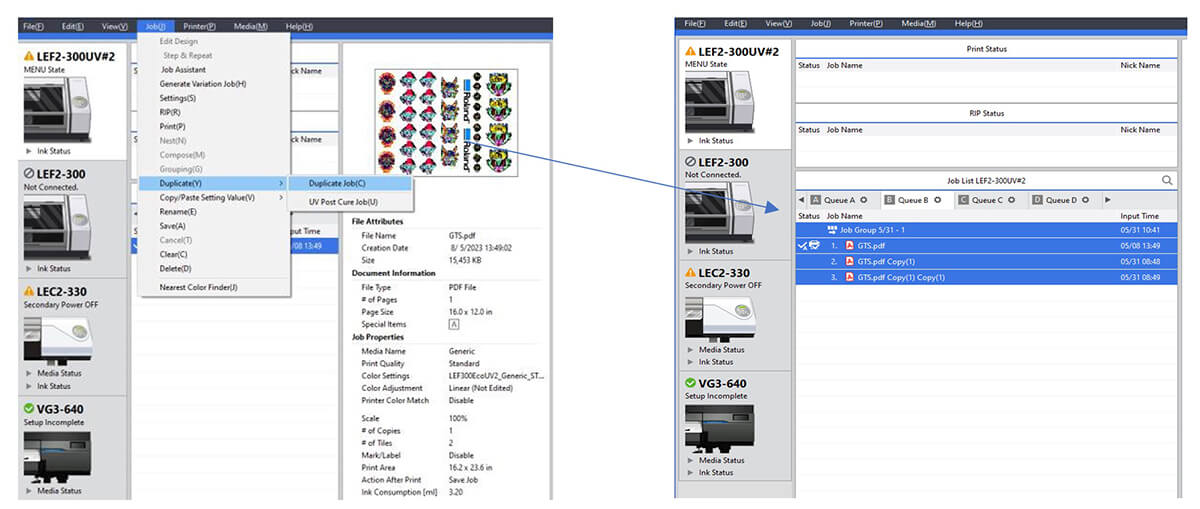
- Duplicate file two times (three files total)
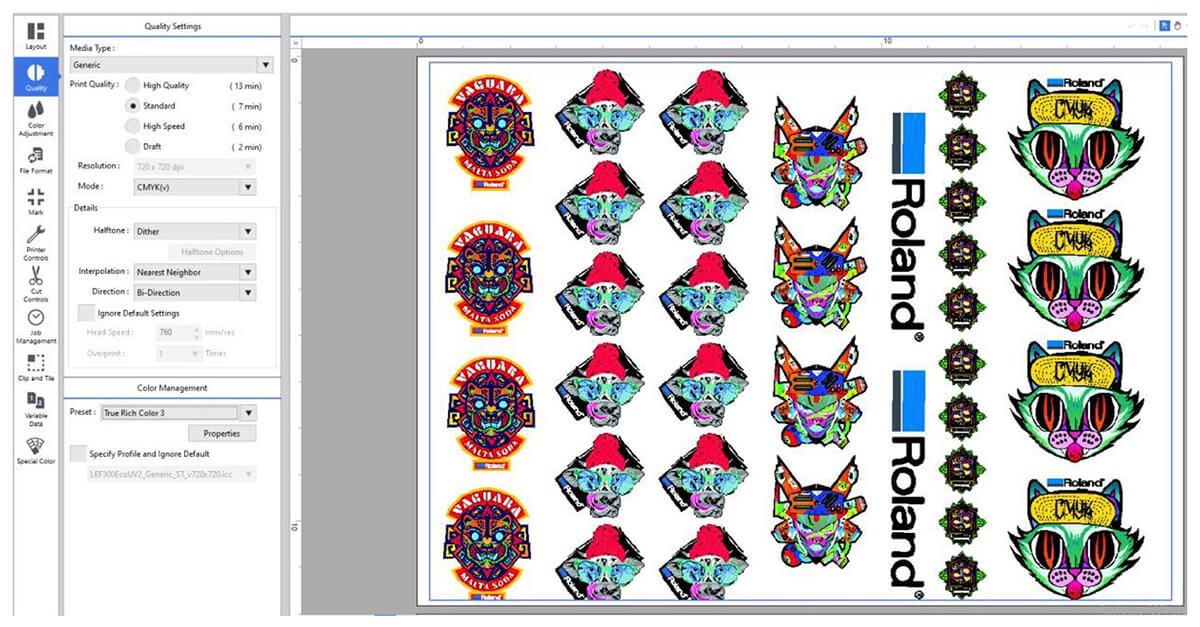
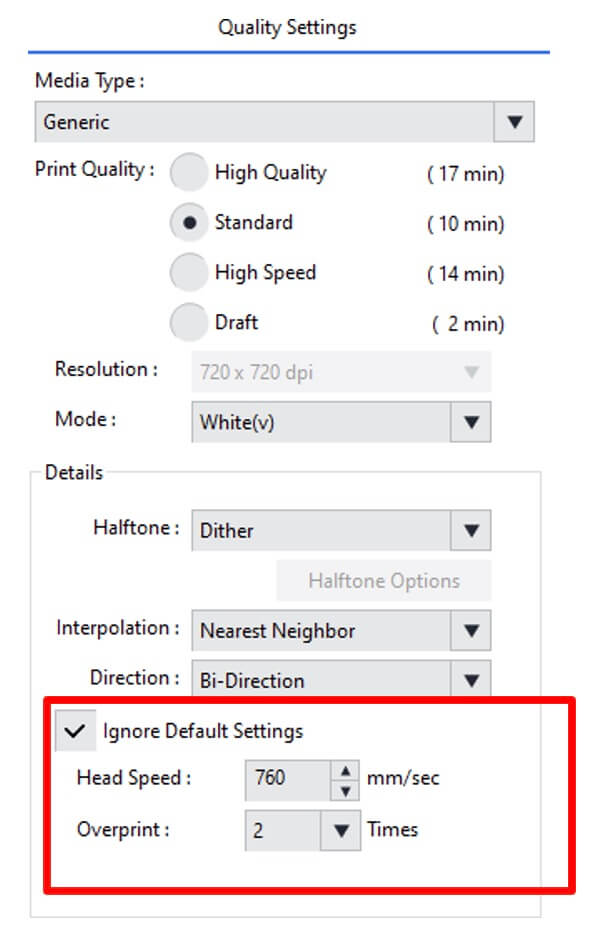
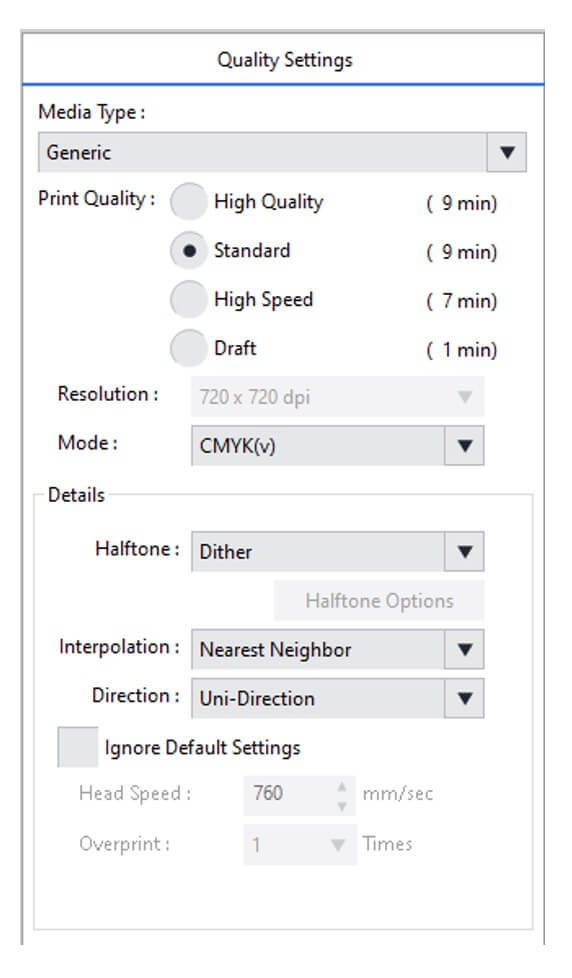
- Then, set File Two-CMYK (File 2)
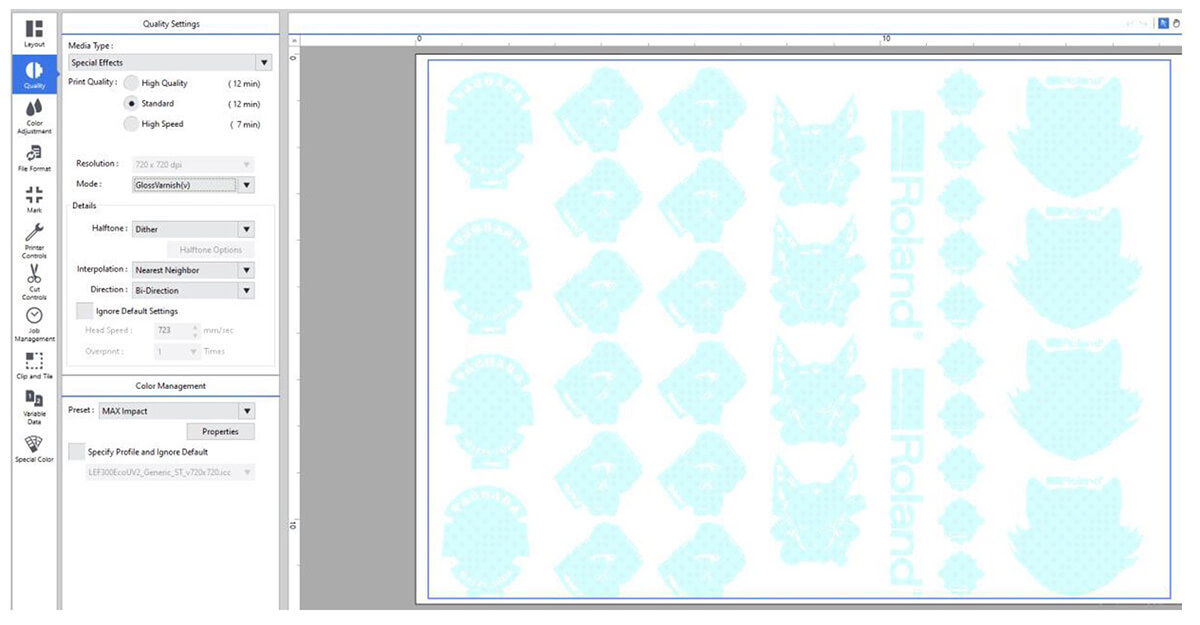
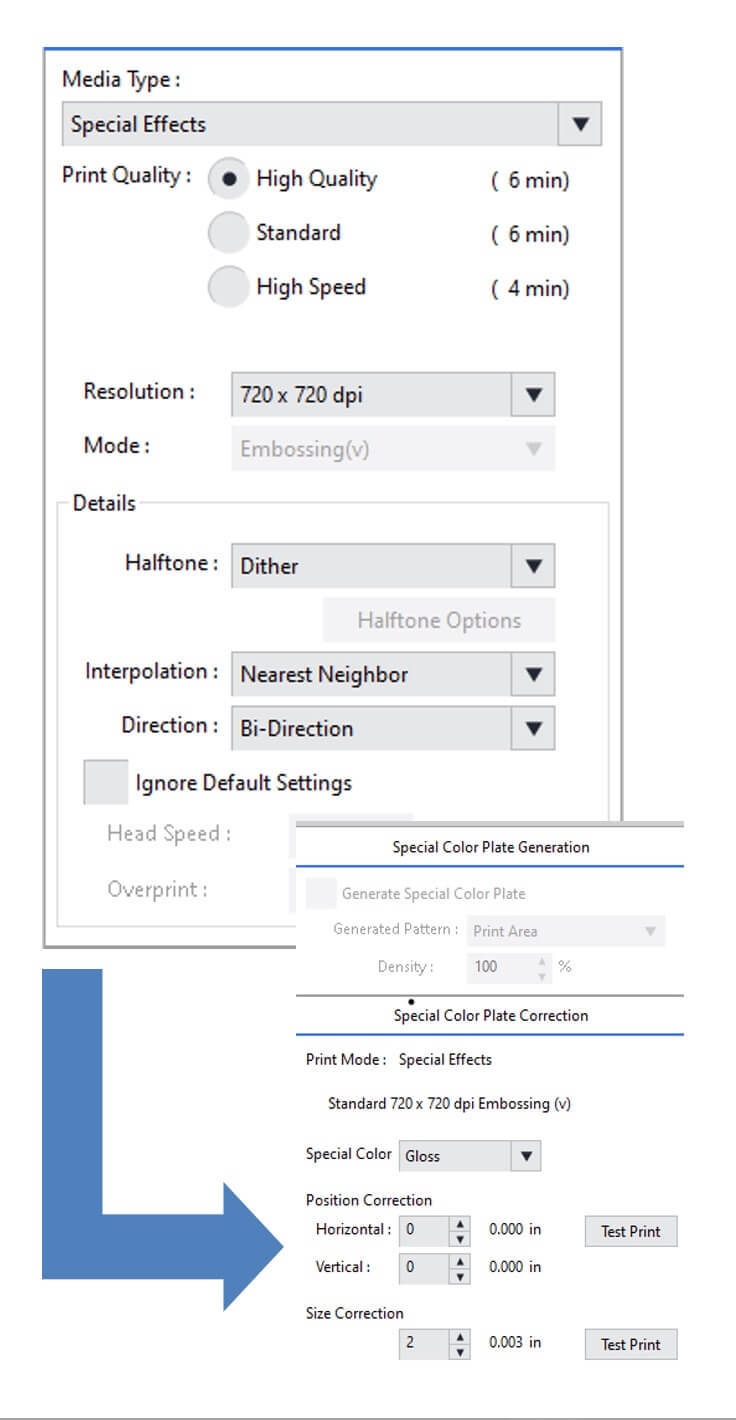
- File Three Gloss set to embossed+2 spread (File 3)
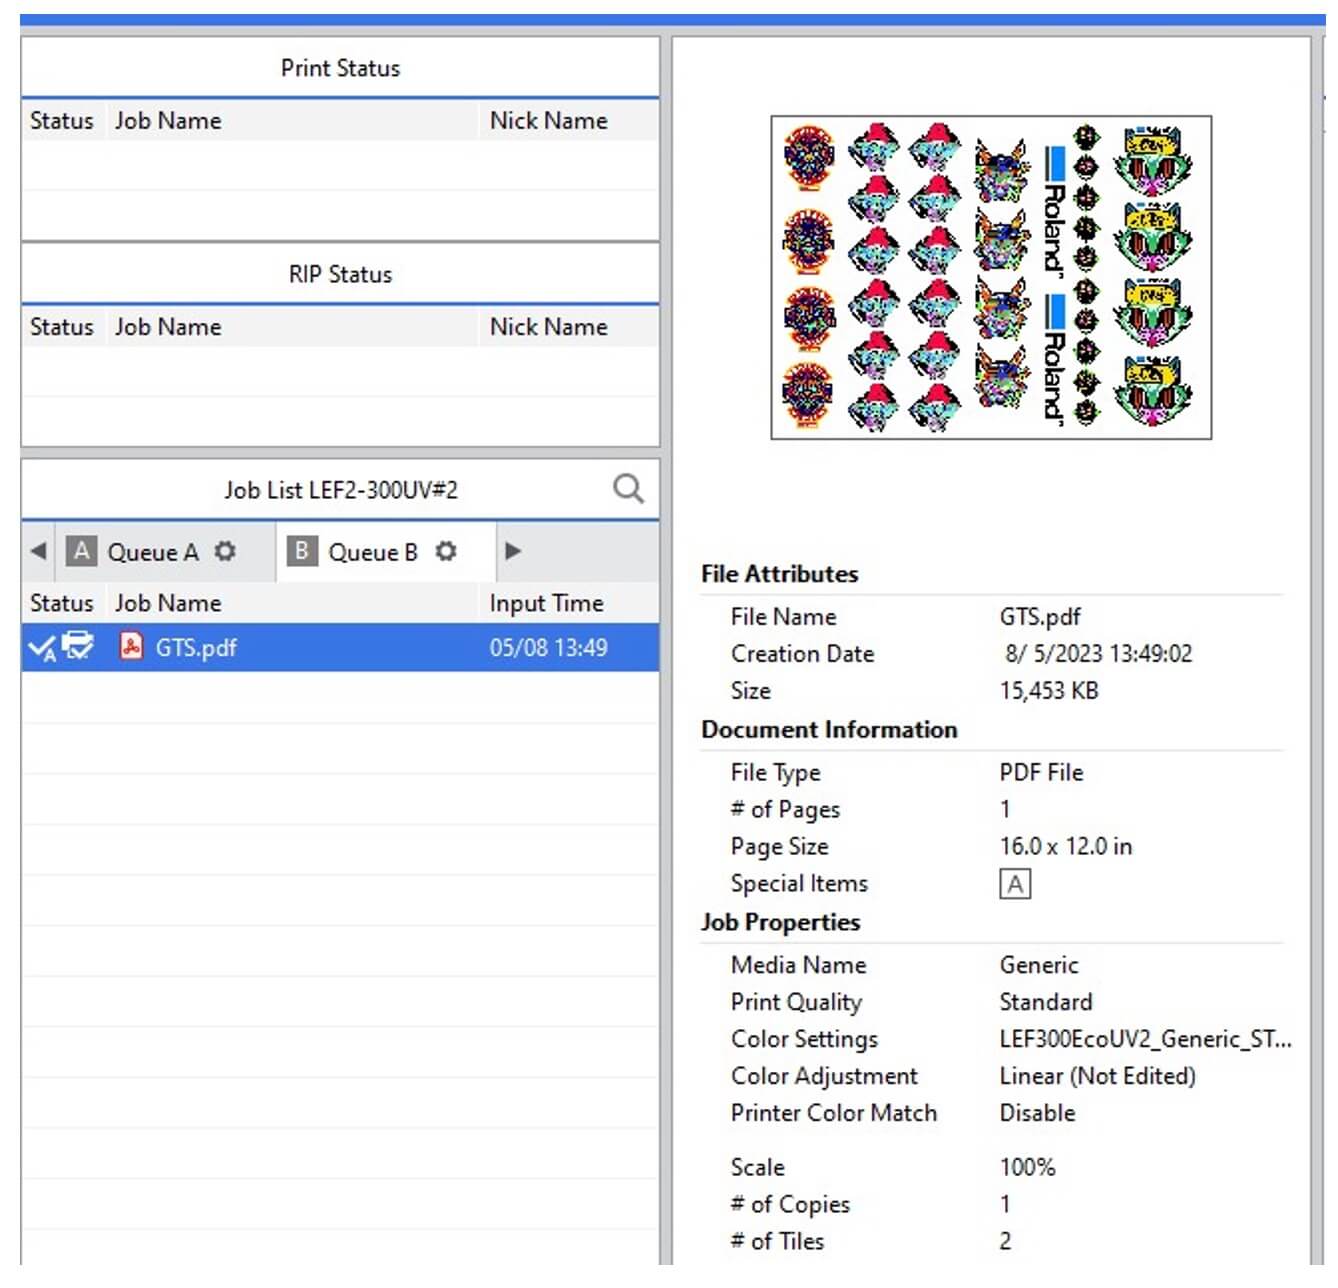
Now that you have a White, CMYK, and Gloss file set as a grouping, you are now ready to print.
Recap of settings: In VersaWorks
File one-White-Set 2 overprint
File two-CMYK
File three-Gloss embossed- Spread +2
We hope this Quick Tip proves useful as a quick reference for properly setting up to print on GTS. You can also view setup videos at https://www.rolanddga.com/gallery/roland-tv.
