
Starting at “A” and kicking off our A-Z series of what you can print on with a Roland DG printer, is “apparel.” The following steps show an alternative to directly printing on items such as t-shirts, sweatshirts, bags, hats and more! It’s easy to get started in custom apparel. All you need is a Roland DG printer/cutter and Heat Transfer Material (HTM3).
HTM3 is specifically designed for inkjet transfers to cotton or cotton blend garments, which makes it an ideal alternative to printing on fabric items. It’s an opaque media, which means you can use it on dark garments as well as light ones. It works with a wide variety of ink types including pigment and mild solvent inks. HTM3 prints and contour cuts very well and delivers outstanding color saturation.
To create custom apparel with your inkjet printer/cutter and Heat Transfer Material, use the following workflow*:
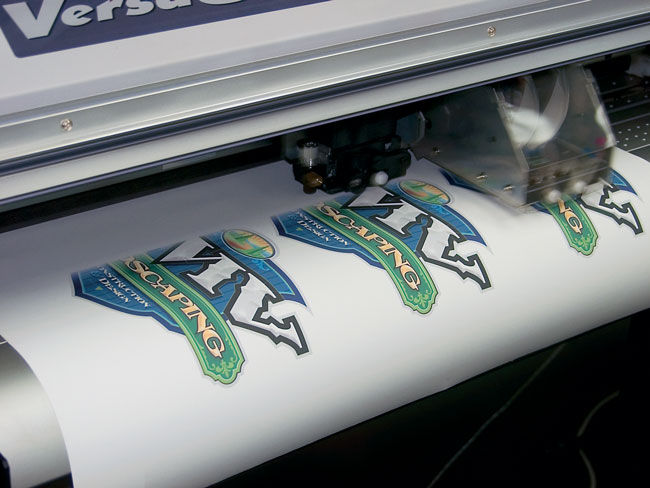
- Setup your artwork with print data and cut paths in your Roland DG RIP software.
- Send the artwork from the RIP software to the print/cut device for printing and cutting on Heat Transfer Material (HTM3). Be sure to use the appropriate color-management profiles for HTM media. The colors of the printed image will appear somewhat subdued on the media, but will appear fully saturated upon heat transfer.
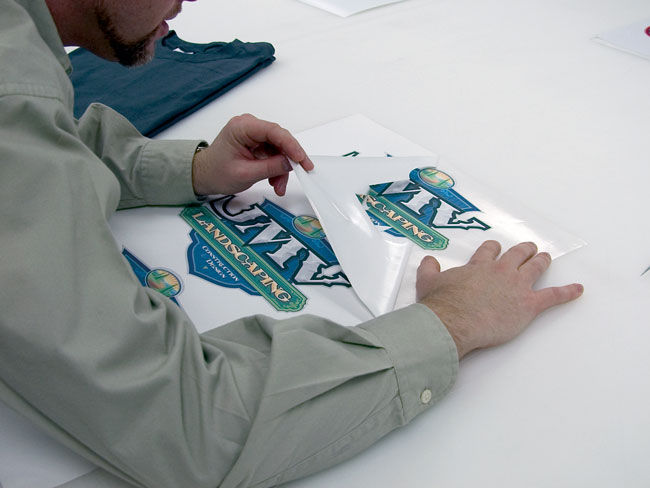
- Weed excess vinyl away from the graphic.
- Clean your blank garment with a lint roller or brush. This will pick up any loose materials or fibers that can cause discoloration and spotting when the garment is heat pressed.
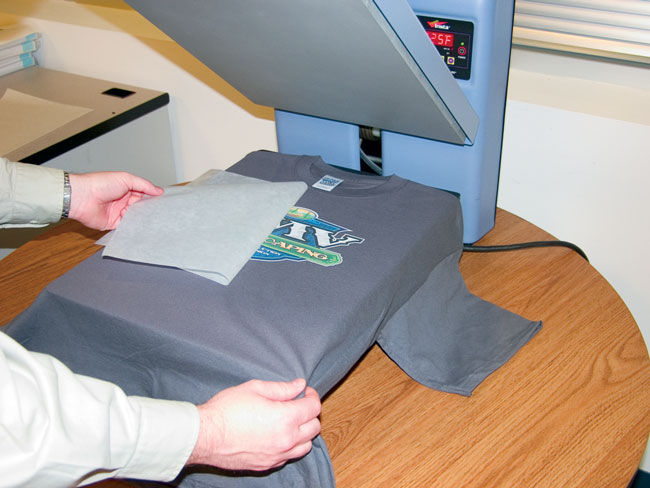
- Preheat the heat press. Temperature will vary based on the garment material and heat transfer paper, but HTM3 typically works best at 325 degrees F. Place the garment flat on the press and briefly prepress (5 seconds or so) the area where you want to apply the transfer to smooth away any wrinkles.
- Position the freshly printed and cut image on top of the garment. If you have a lot of small lettering, you can use transfer tape. Place a Teflon® release sheet or silicon release paper over the graphic.
- Press the image and the garment according to the recommended time and temperature settings for your material (typically 325 degrees F for approximately 15 seconds, when using Roland DG HTM3). Using the correct time and temperature settings are critical for a successful heat transfer – testing and adjusting as needed is recommended.
- Carefully remove the release sheet to reveal a bright and durable finished product.
Learn more about Roland DG’s dye-sublimation, desktop and large format printer/cutter machines for apparel production.
* These steps are intended as a general guide only. See actual material and equipment manufacturer’s recommendations for details. CAUTION: Using a heat press can cause burns – handle with care.
