
por Jay Roberts, Gerente de Productos, Impresoras UV, Roland DGA Corporation
Una de las verdaderamente fantásticas funciones disponibles en VersaWorks® es la herramienta “Nearest Color Finder” (“descubridor del color más próximo”). Esta función le permite seleccionar un Color Plano y encontrar la “mejor” representación del color que el dispositivo imprima según sus parámetros de gestión cromática (tipo de papel/ modo de impresión/ perfil .icc, etc.). Aunque esta herramienta puede ser increíblemente útil, existen algunas reglas que deben ser seguidas para poder aprovecharla:
Regla #1
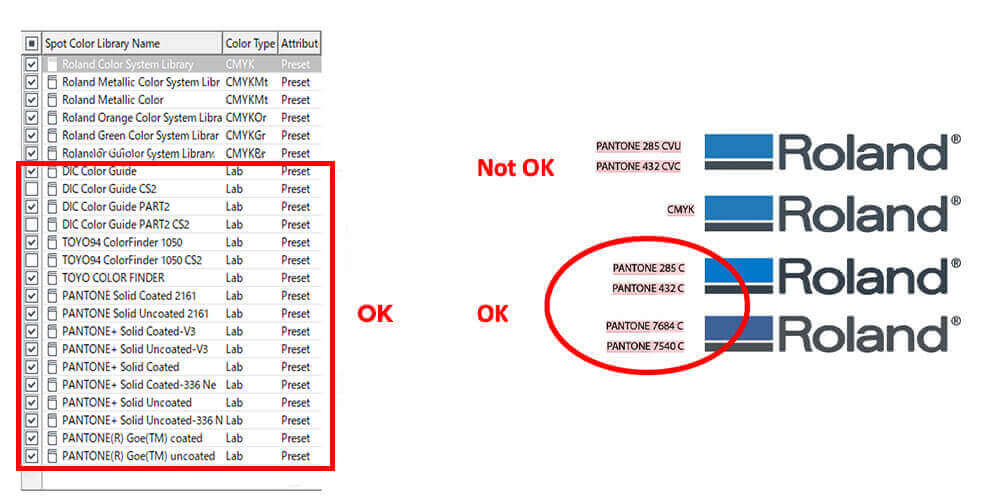
¡Tiene que ser un color PLANO! Esto significa que los colores CMYK, RGB o LAB creados en Illustrator, Corel o aplicaciones similares, NO FUNCIONARÁN. ¡Tiene que ser un color PLANO como Pantone!
Regla #2
NO TODOS los colores Planos funcionarán.
¿Entonces cómo usar esta herramienta? ¡Aquí un breve tutorial paso a paso para que usted pruebe, practique y use en su local! Una vez que usted tenga un archivo con el Color Plano en éste, proceda así:
Paso 1
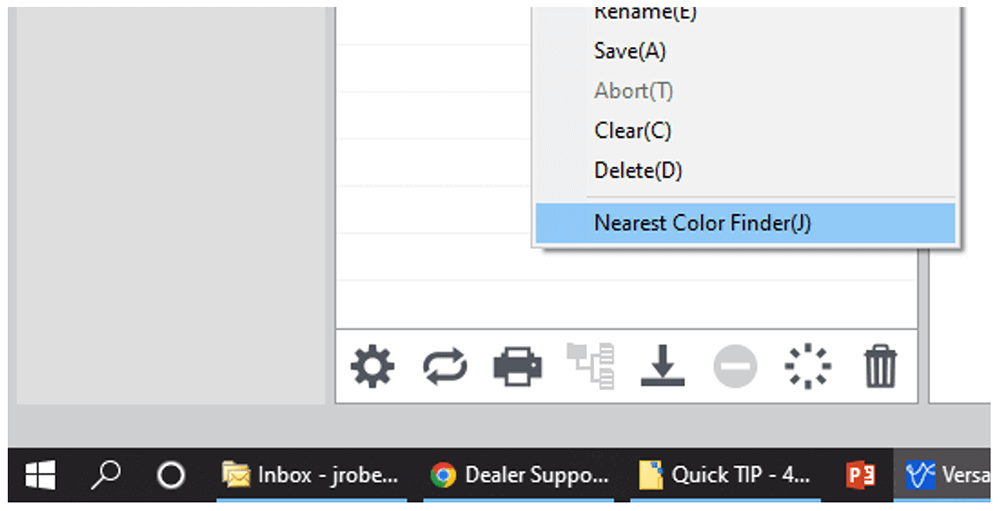
- Cargue el archivo y haga “clic” en “Nearest Color Finder” (“descubridor del color más próximo”).
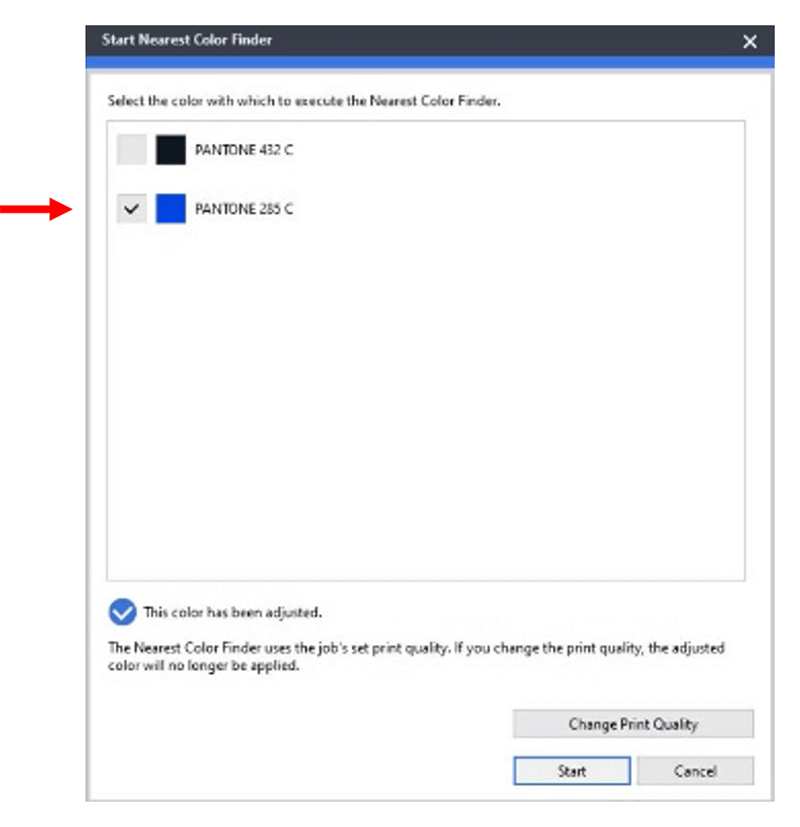
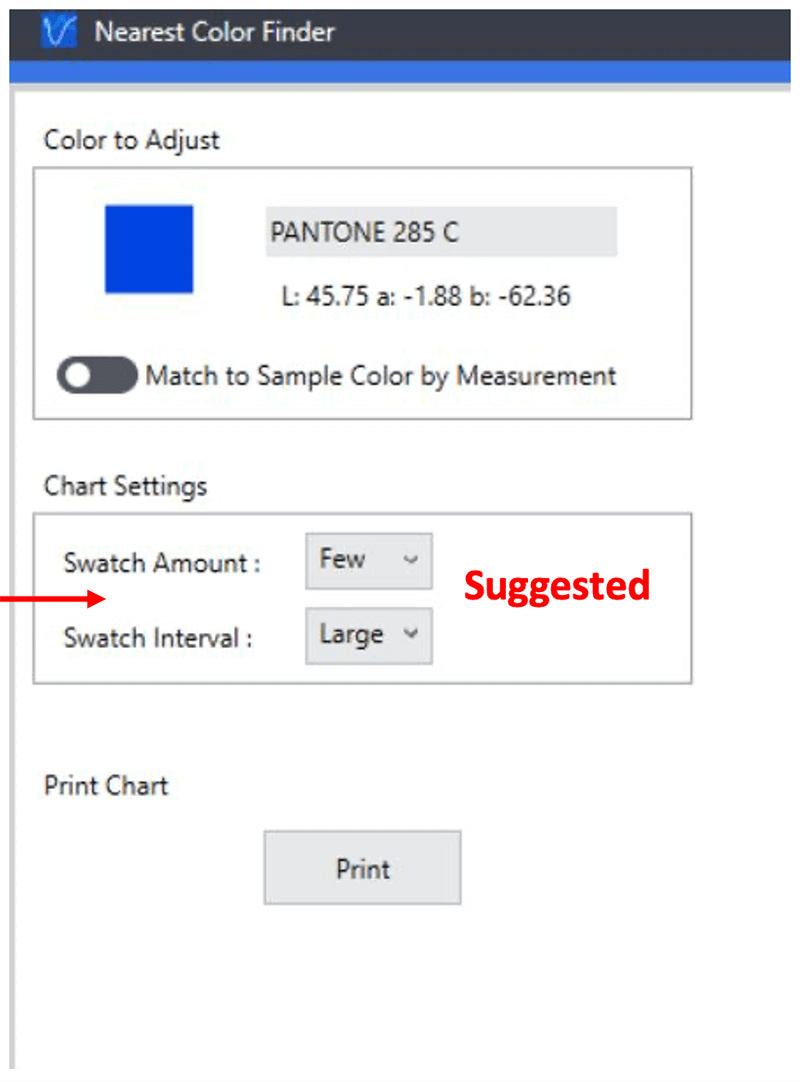
Paso 2
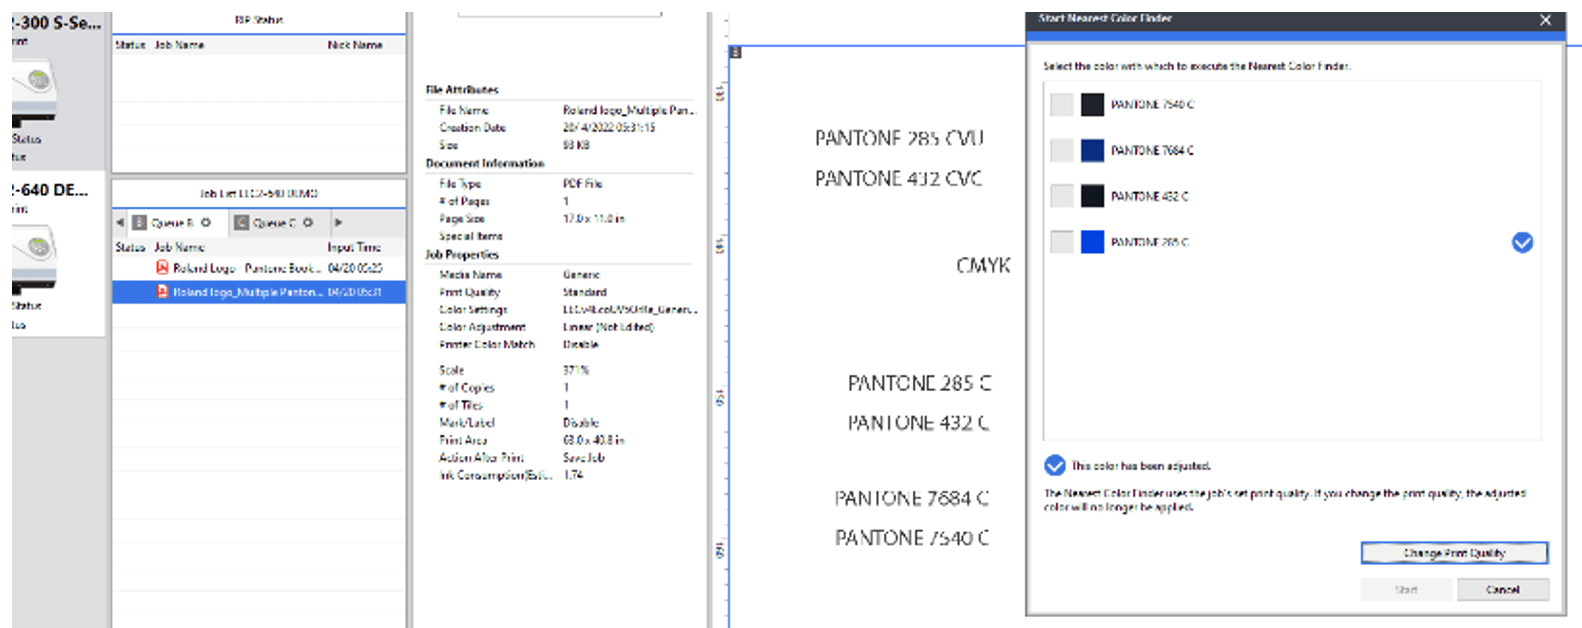
- Seleccione el color PLANO a ser “evaluado”.
- Establezca los valores para definir el número de muestras.
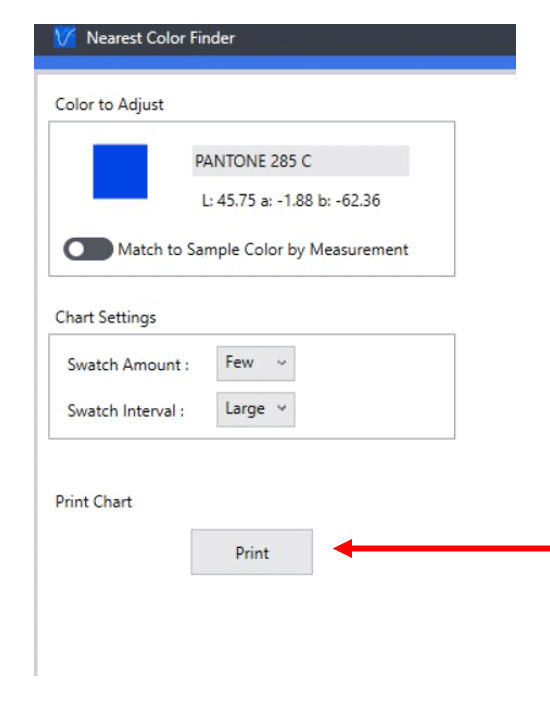
Paso 3
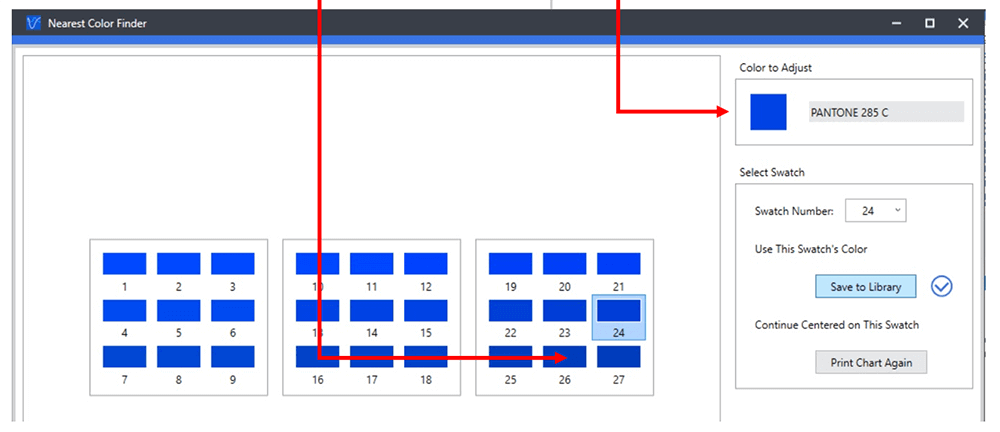
- Imprima y examine.
- Una vez que haya hecho la impresión, seleccione el color Plano que mejor represente el color deseado y resalte la casilla.
Paso 4
- Imprima el trabajo.
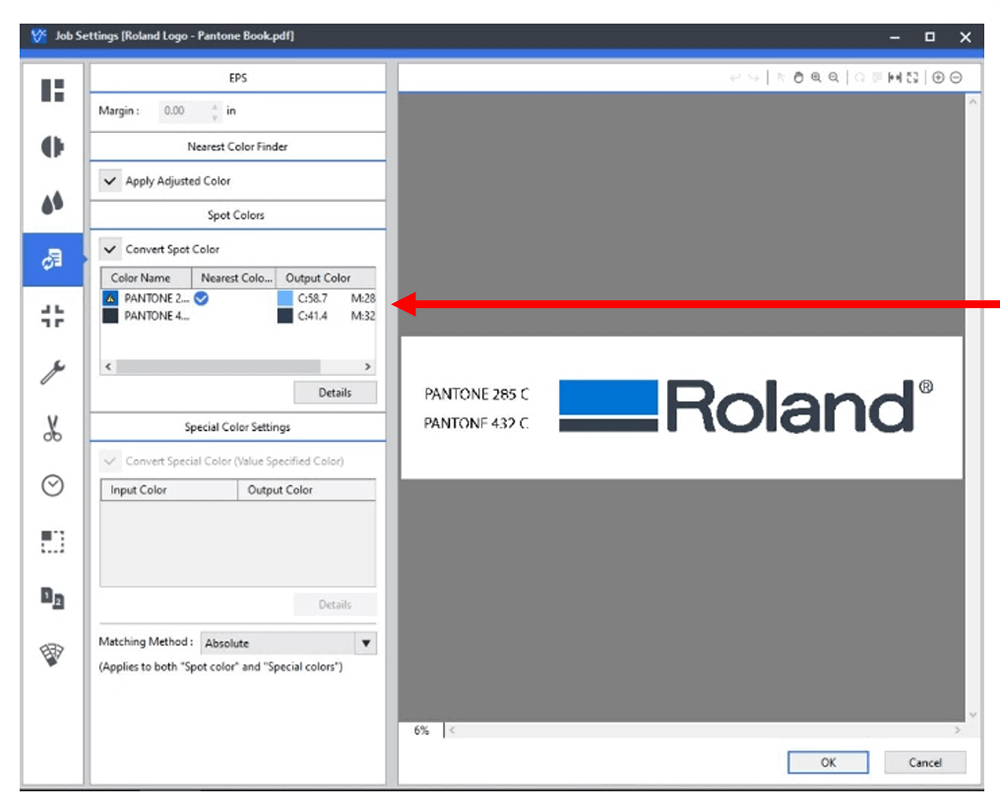
NOTA: en la pestaña “File Format” (“formato de archivo”) de VersaWorks®, el color seleccionado ahora se mostrará como el color deseado.