
Applying doming on badges, pen caps, and other items brings a high-quality, professional look to these products while offering the additional benefits of scratch resistance and increased durability.
Doming Defined
Doming is the process of applying a clear plastic liquid coating to the exterior of an item. When the plastic hardens, it creates a raised and somewhat rounded surface, or “dome” on the top of the item. Because the coating is clear, graphics and lettering below it are clearly readable. The effect it provides is sometimes referred to as a lens look.
Adding a dome extends the life of your product, protecting your printed graphics from moisture, dirt, and oils as well as from nicks and scratches. The coating also provides an effective sealant for paint-filled engraved lettering and graphics. Doming can even be used to prevent oxidation on diamond engraved plates.
Equipment and Supplies
To create a professional looking dome, it is important to use products designed specifically for this process. In general terms, there are two types of sealants for doming applications: two-part mix-and-dry material, and UV curing material. Two-part mix-and-dry materials are combined then applied to the item. The drying process for these products takes anywhere from 2 to 24 hours, depending on the specific product used. UV curing material is a one-part sealant that is applied and then cured for between 5 and 25 seconds under UV light. While the UV curing process requires the purchase of a UV light source, or exposure unit, the curing time for this product is dramatically shorter than for the mix-and-dry materials.
Apart from their curing methods, sealants also differ in the type of coating they create: some produce rigid surfaces while others create flexible surfaces. While rigid surfaces provide maximum durability, flexible surfaces also protect your graphics well and will return to their original domed shape a few seconds after being dented. Flexible materials are generally recommended for use on flexible substrates such as decals because they will not shatter or crack. Rigid materials are recommended for nonflexible substrates such as pen caps. Either flexible or rigid materials are suitable for doming name badges and many other items. Both rigid and flexible sealants are available with a high gloss finish and typically adhere well to metal, glass, and many plastics.
There are several ways to dispense sealants for doming. You can dispense the product manually, using a syringe or other hand pouring methods. Manual or automatic dispensing units are also available, and use compressed air and a barrel with a dispensing tip to distribute the sealant. The user sets the appropriate air pressure and time, and typically activates the unit using a foot pedal. These units offer several advantages:
- Control – With a dispensing unit, you can accurately control the flow rate of the sealant. Using a dispensing unit also usually allows you to control where the sealant is deposited more accurately than is possible using hand pouring methods.
- Smooth application- Dispensing systems generally reduce the number of air bubbles created versus hand pouring.
- Consistency- Dispensing systems provide a consistent output. More advanced systems will help you determine the optimum amount of sealant for each project and will allow you to consistently repeat the dispensing process. Knowing the exact quantity of sealant allows precise curing time calculations, leading to a more efficient workflow.
Creating Your Dome
When you have your materials and equipment ready, here are step by step instructions for creating your dome:
- Prepare your material. To guarantee the best possible output, it is best to dispense the sealant material directly from the original container. If you need to transfer the sealant, it can be poured into the dispensing unit reservoir using a funnel.
- Select a dispensing tip. For badges, you need a relatively large tip.
- Set the appropriate air pressure. Remember, too much air pressure can generate air bubbles in your dome.
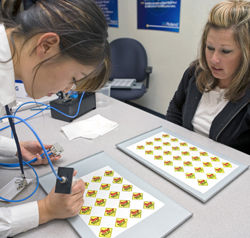
- Lay your items on a flat surface. Placing your items on a tray or other flat surface allows you to transport domed items for curing without having to handle them.
- Determine the pattern for distributing your sealant. How much sealant to apply and where will depend on the size and shape of your item. For round items, plan to deposit sealant in the center of the surface. For rectangular shapes, apply stripes of sealant, beginning about 1/8” from the edge. Objects with irregular shapes may require several application spots and some experimentation to achieve optimum results.
- Position your applicator at a 45 degree angle to the item, holding the tip about 1/8 “ off the surface. Depress the foot pedal or syringe to apply the material.
- Dispense enough material so that it reaches the edges of your item without overflowing. If the material doesn’t spread well, try increasing the amount of sealant, or use a small piece of plastic to help spread the sealant. These steps shouldn’t be necessary once you determine the correct quantity of material for the item you are doming.
- When the sealant has been applied, allow it to sit while the material spreads, then begin the curing process. Properly cured items will have a smooth, rather than sticky, surface.
What to Watch For
Large numbers of air bubbles in your coating can mean that your air pressure is set too high. If there are only a few bubbles, you may be able to use a pin to gently pierce them. Air bubbles are generally permanent once the sealant has cured, however, you may be able to burst them by passing a propane torch over the cured surface.
The Finished Product
Doming adds a professional touch to your graphics and provides durability that your customers will value. These techniques, together with the proper equipment, tools and some practice, will allow you to easily create high-gloss flexible or rigid domes on badges, pen caps, nameplates and other items.
