
Roland DG ECO-UV S inks are optimized for VersaUV technology and are designed for flexibility and superior imaging. They offer enhanced scratch and alcohol resistance and adhere to a wide range of coated and un-coated materials.
In addition to CMYK, ECO-UV S is offered as a Gloss ink and can be used for highlights, special effects, realistic textures and enhanced durability and adds an unprecedented high gloss finish.
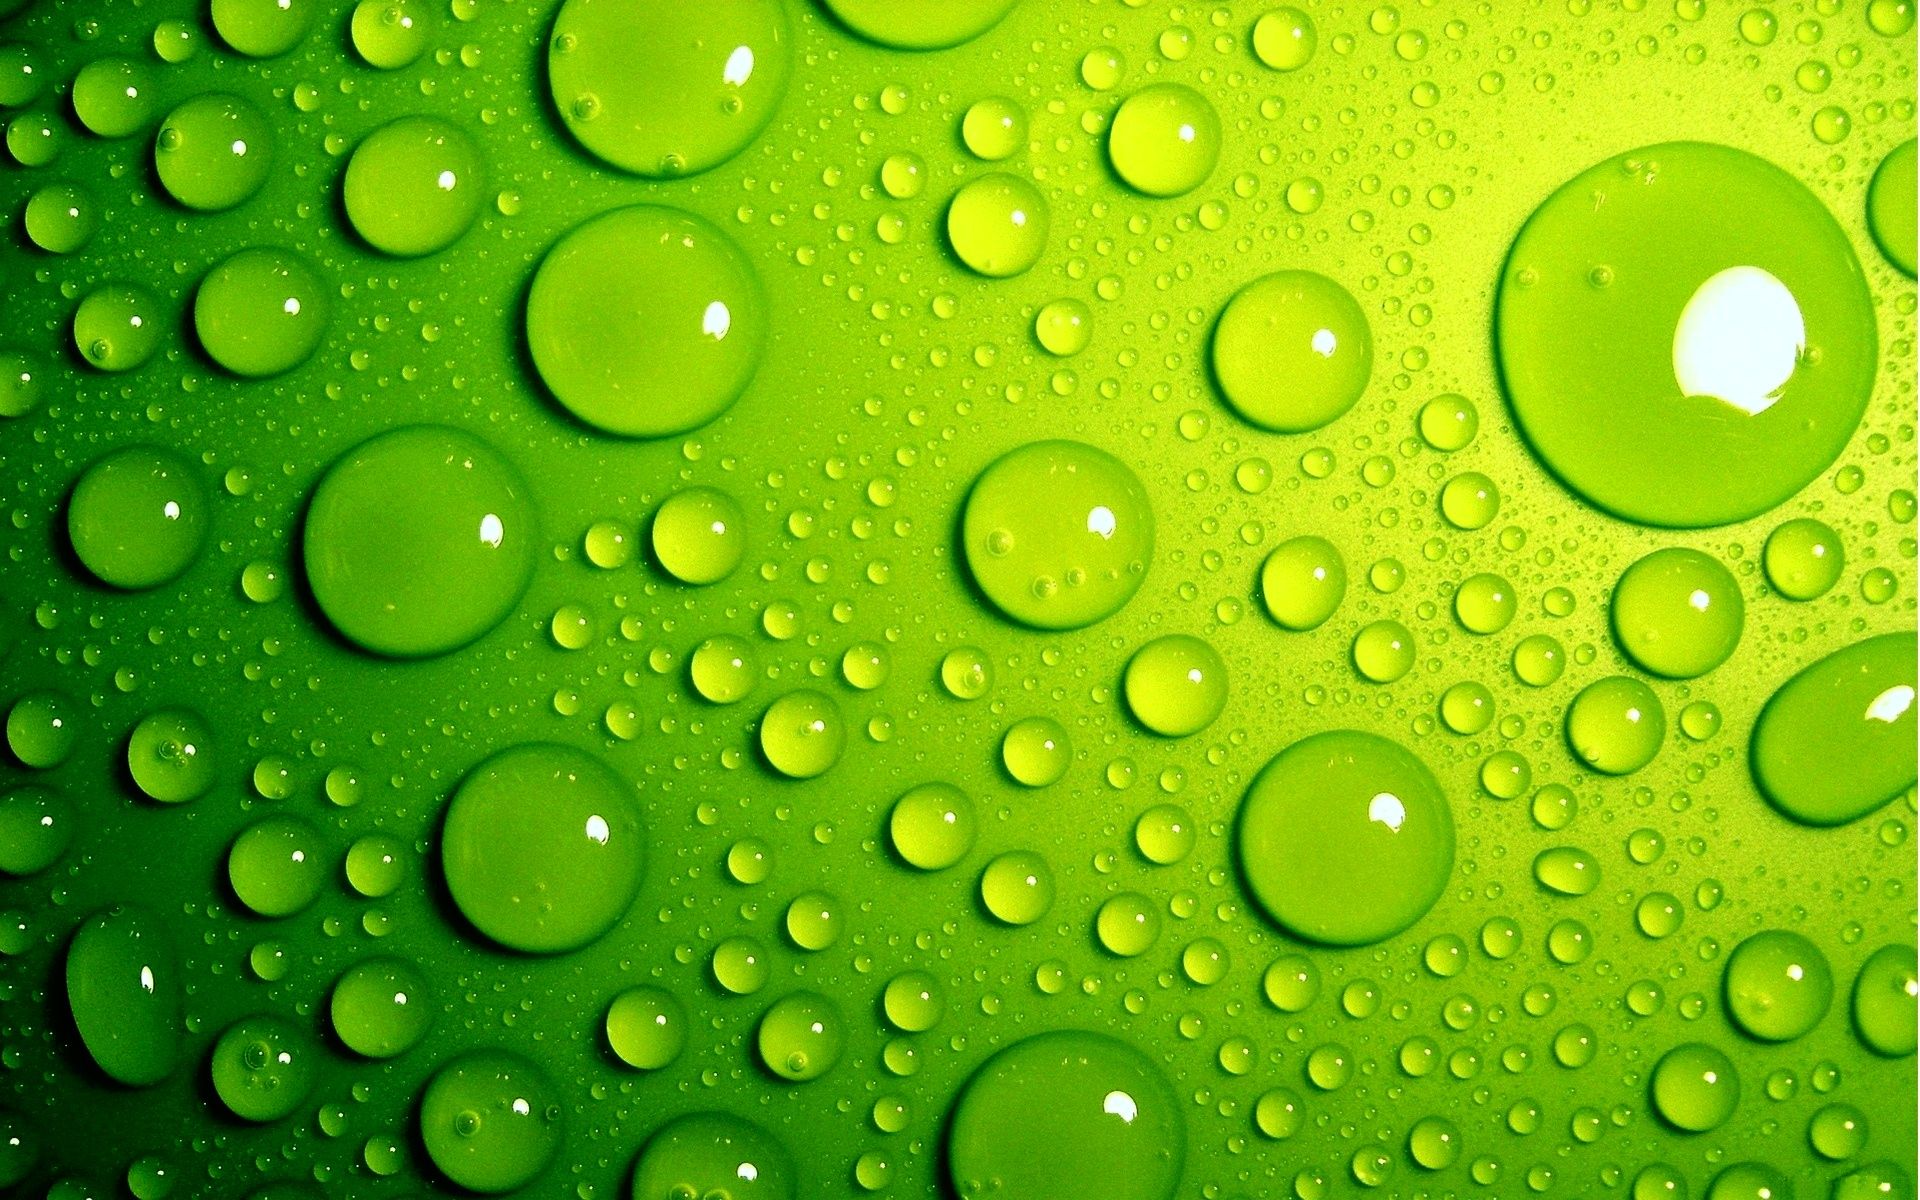
Applying ‘clear’ on a raster image can be tricky at times. However, having the right tools and the know-how can make this an easy task.
-
Using the right software and opening the raster image file
If you have the right tool- in this case, software – you’ve already accomplished half of this process. For this example, we used Adobe Illustrator and ‘RDG_GLOSS’. If you’ll be using an earlier version of AI, we don't recommend anything earlier than CS3 or later.
-
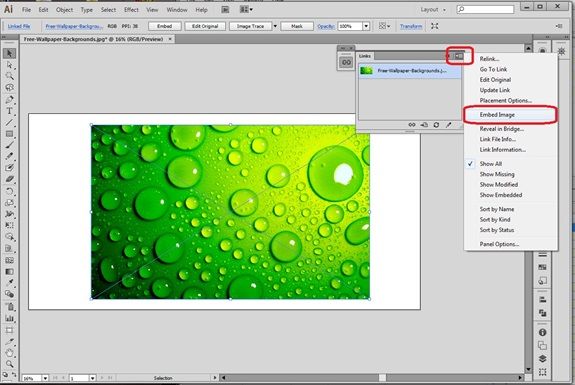
Select the raster file and open it with AI. Make sure the raster file is embedded, not linked. If the file is linked (indicated by diagonal lines), embed the file by selecting Window>Link to display the ‘Link’ window. Then click on the pull-down menu on the Links window and select ‘Embed Image’ to embed the raster file.
Note: When originally published, this article used an earlier version of Adobe Illustrator. All these same processes can be applied to the current Adobe Illustrator CC.
-
Note: To make any adjustments to the raster image, it is better to convert the image to grayscale and make changes in Adobe Photoshop®.
-
Converting the raster image file to grayscale and applying the spot color
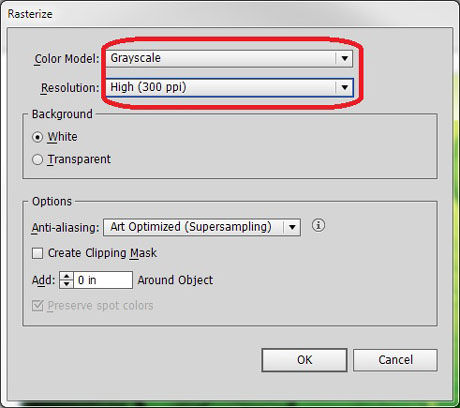
Once the raster file is embedded, the next step is to remove the color and convert the file to a grayscale image. To do thisi n AI, select the raster file and click Object>Rasterize. From the ‘Rasterize’ window, select ‘Grayscale’ for Color Model and ‘300 ppi’ for resolution. Then, simply apply ‘RDG_GLOSS’ spot color to the grayscale raster image.
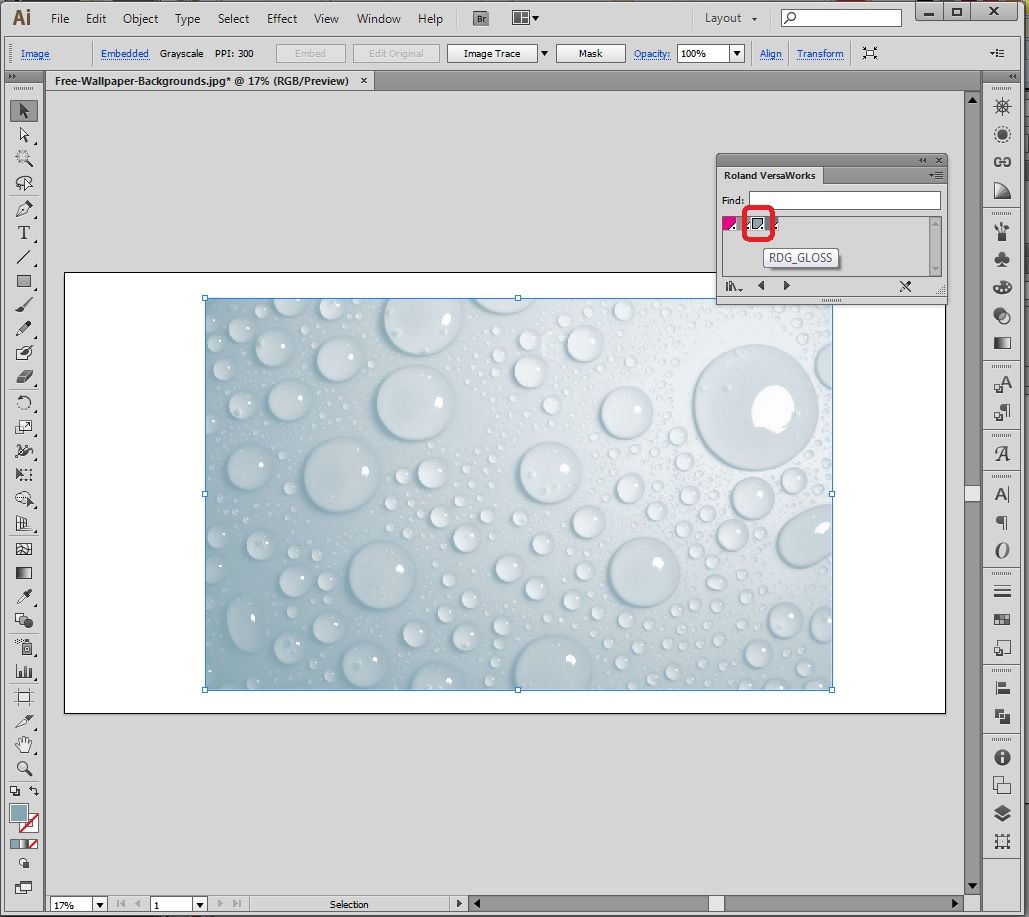
Note: More gloss will be applied to darker areas on the image.
-
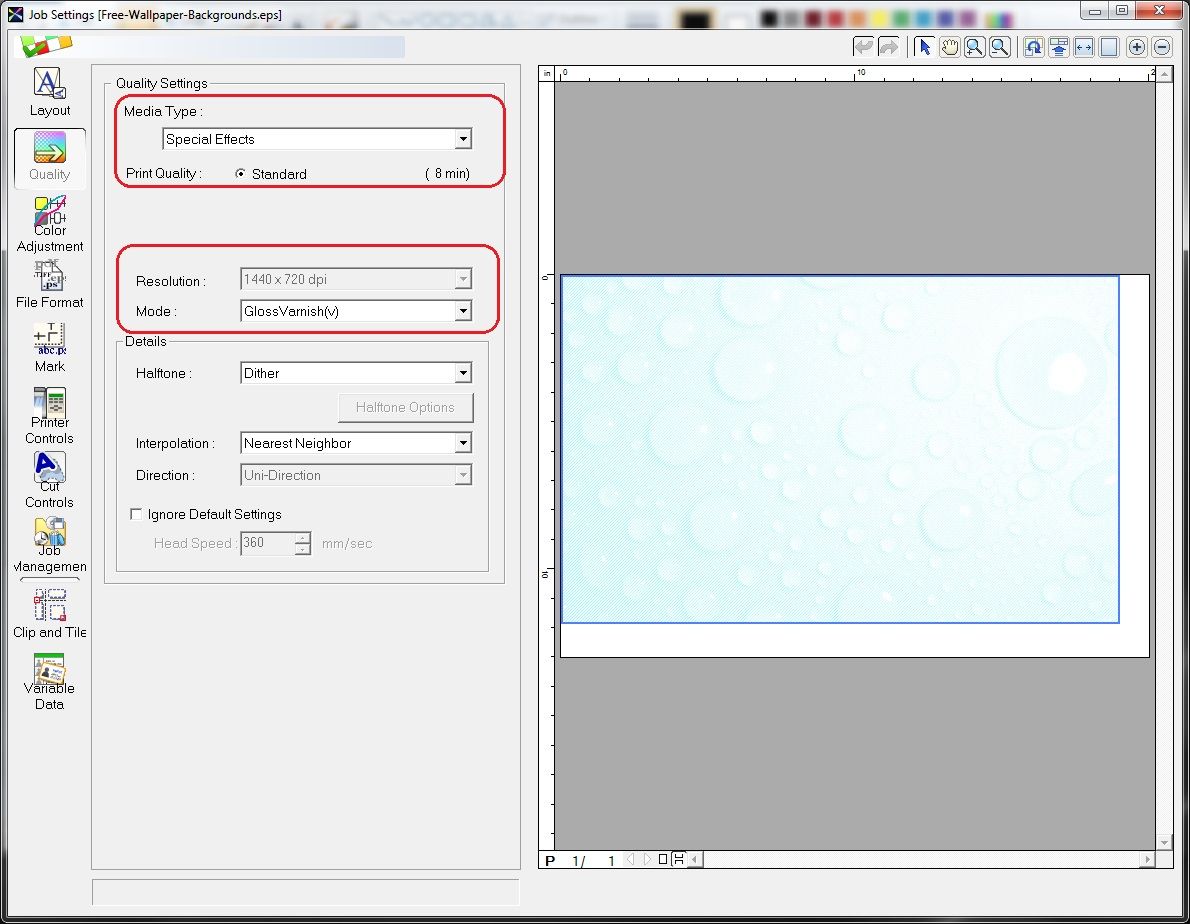
Saving the file and adding the print job to Roland DG VersaWorks®
The last step is easy. Just save the file in a format that Roland DG VersaWorks 6 supports (i.e. PDF or EPS)— adding the file to VersaWorks 6. Choose your settings in ‘Job Properties’ as shown in the image below to verify the print and you’re done.
Note: This method can also be used to apply ‘White’ ink.
- Roland DGA offers a choice of VersaUV flatbed printer technology to add graphics to products, merchandise, signage and more. See how you can personalize and customize media, adding raised Gloss ink textures and other stylish effects with a choice of devices in a range of sizes and budgets.
NOTE: This blog has been modified from its original version.
