By Lily Hunter, Roland DGA, Senior Product Manager of eCommerce & Supplies
The new VersaSTUDIO BT-12 is a popular low-cost, entry-level DTG printer. In addition to being incredibly easy to use and maintain, the BT-12 is engineered to deliver outstanding print quality. Here are a couple of tips and tricks you can use to yield the best prints.
1. Adjust the Color Density When Installing the Printer Driver
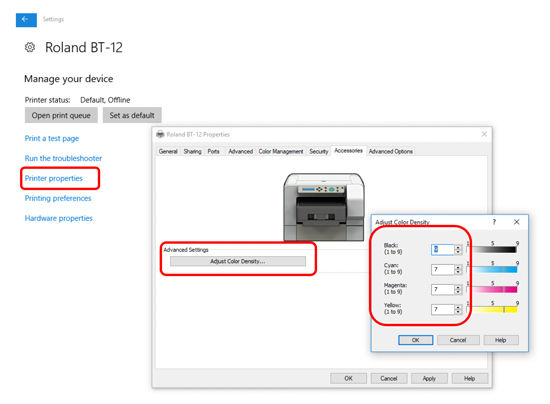
When installing the printer driver for the first time, you can set Color Density when prompted to set the Initial Printer Settings. If you miss that step, you can still adjust the settings for your printer driver. First, go to the BT-12 settings and select “Printer Properties.” Then select “Adjust Color Density.” Set them to the following levels: Black – 9, Cyan/Magenta/Yellow – 7 per color. Click “OK” when done.

2. Adjust Brightness and Contrast Levels in Roland Design Software
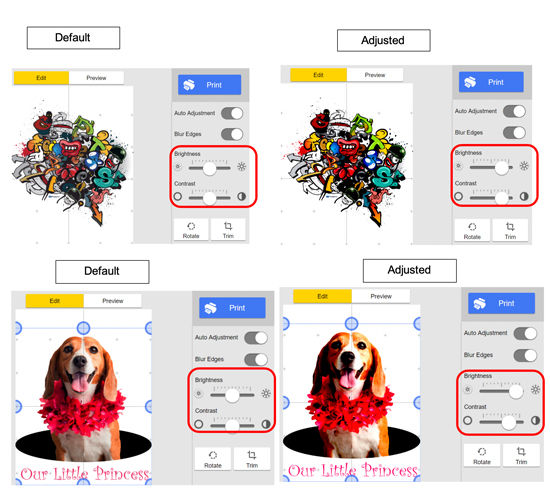
Manually adjusting the Brightness and Contrast levels of the selected JPG and PNG images in the Roland Design Software will help make your images “pop.” Moving the slider bar for both properties to the “75%” level works on most images. However, some photos may require changes in the “Brightness” level and little to no change in “Contrast level.” Adjust as needed, based per what is displayed in Roland Design Software.


