Old habits die hard around my sign company. For years and years we have designed and created effective window graphics for numerous retail businesses. Vinyl lettering and window graphics were always created on our plotter with solid color vinyl and assembled in layers on site. With my Roland DG VP-540, the same jobs are completed in about 25% of the usual time, with a definite upgrade in appearance and value for the customers.
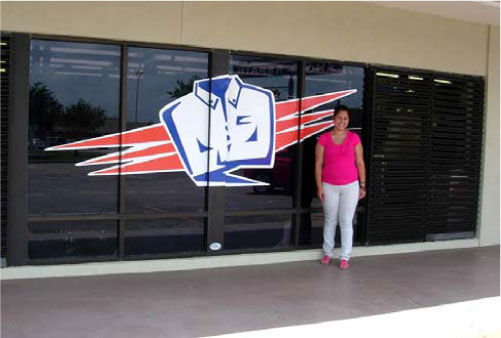
This project is a repeat of several similar jobs performed over the years for two of my favorite clients, Gary and Scott Farine, from Galveston, Texas. Scott had just completed a major renovation of one of his dry cleaning plants in southeast Houston. Seeing all the tinted windows gave Scott a great idea. Studying the two sets of windows on either side of the main doors, he decided to add a couple of “super logos” which would cover most of the windows and create an “in-your-face” advertising message. I entered the window measurements into my design computer and we quickly arrived at our two designs. One set of windows would have the large “attitude shirt” graphics, and the other set of four windows would feature his Exec Express club for his repeat customers.
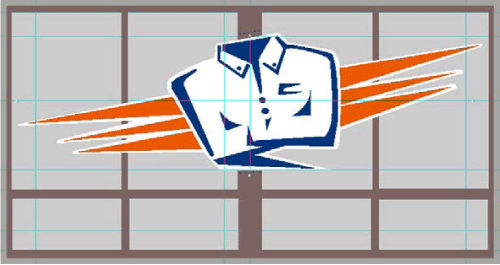
Scott’s “attitude” shirt graphic is very effective and definitely “in your face”. We have used it on several delivery trucks, coroplast signs, and other windows at other stores; however, this time we’ll span a set of four windows and we’ll let the shirt do the talking –with no additional graphics whatsoever. The next step is to pull up these designs in my workstation and then the layouts of the eight windows. The design was sized to fill the upper four windows. Taking the file and converting it to an .eps file was the next step, and from there we imported the file into Adobe Illustrator to assign our perimeter cut file.
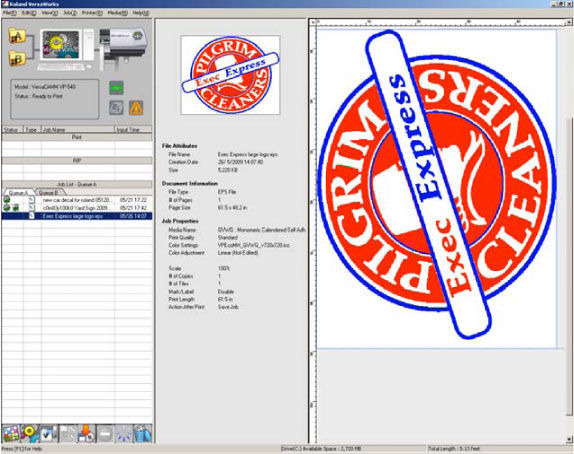
Finally, I imported the file in the Roland DG VersaWorks program for printing and perimeter cutting.
After the printing, we laminated each print and repositioned it into the Roland DG VersaCam VP-540 for the final perimeter cut. From there, we weeded the excess vinyl away and applied transfer paper to the entire image.
The next large logo was the Executive Express logo, which was imported into Adobe Illustrator and assigned the perimeter cut as well. Now off to VersaWorks for the actual printing. After less than ten minutes, we had our new print, ready for lamination and perimeter cutting. Finally it was time to apply the transfer tape to this logo as well. In addition to this laminated print, we also used cut vinyl graphics for the words “Join Today”, cut on our 15” sprocket plotter.
Armed with both of our laminated and perimeter cut VP-540 prints, we loaded the truck for the short drive over to the Pilgrim dry cleaning plant. Shortly after arriving, we unloaded the necessary supplies and tools to make our installation a success. A step ladder, our vinyl application tool kit, a large bottle of “Rapid-Tac” wetting solution, and a few rolls of paper towels. Now let’s get stickin’.
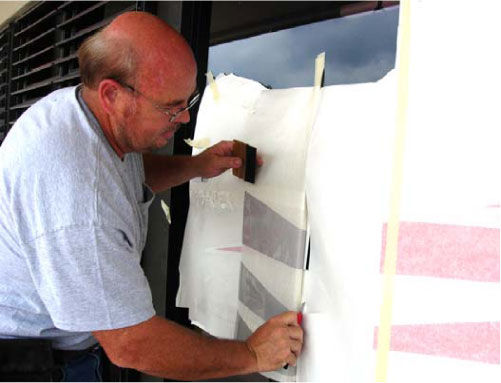
Step one in any window graphics project is to begin with “squeaky clean” windows. We do this by spraying a generous amount of Windex glass cleaner onto each window that will be decorated. Spray, wipe and wipe again until completely dry. Next, we’ll align our digital print in the exact middle of the set of windows. Running two long strips of high tack masking tape vertically down the middle of the print will hold it in place. Next, we added more masking tape to hold the left and right hand sides down on the glass as well.
The next step is to run a vertical piece of masking tape down each horizontal mullion where the print crosses the mullion. Make sure you use enough tape to secure the print to the mullion. Now, take your Olfa or X-acto knife and make vertical cuts down the print on each side of the mullion. Take you time and be careful – straight cuts look so much better.
If each window is covered by a portion of the digital print, create a new masking tape vertical hinge right down the middle of the print covering that pane of glass, securing the print to the glass above and below the actual print. Do you have enough hinges yet? Don’t worry, you will use them all, and you’ll be glad you have them!
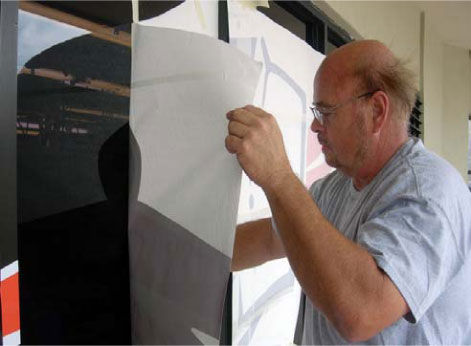
The “Attitude” shirt graphic covered four windows, so I began with panel number three. I folded the print over to the left, right up to the tape hinge. Taking my Olfa knife, I pulled the backing sheet from the lifted vinyl and cut it away. I then applied a generous coat of Rapid Tac wetting solution to the back of the print.
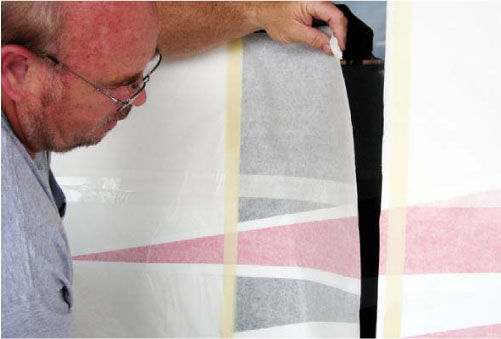
Next, I gently guided the digital print onto the glass, using a Velcro-covered squeegee. When I was satisfied that the bubbles were worked out, I removed the tape hinge, and then folded the other side of the digital print over and removed the backing sheet. Spraying a little more Rapid Tac onto the print and guiding it into place on the window, I used my Velcro covered squeegee to force the solution to the bottom of the print, where it would escape and leave my prints “bubble free”. The remaining panels were laid in the same manner and the transfer paper covering the prints was removed. The small strips of the digital print which will cover the mullions will be laid next. The backing sheet was removed and the 1.5” print was gently guided into place, without any wetting solution. A final rub down with the Velcro-covered squeegee sealed the prints to the aluminum mullion.
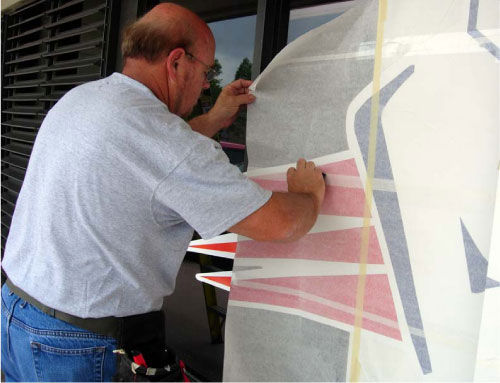
Finally we can remove our application tape from the digital prints. I prefer to start at the top and gently roll the paper down, creating a small tube as I go. This method causes less stress to the digital print and you will find less bubbles are created using this process. Repeat this for all windows and carefully inspect the print for bubbles and wrinkles – which can usually be removed without too much trouble.
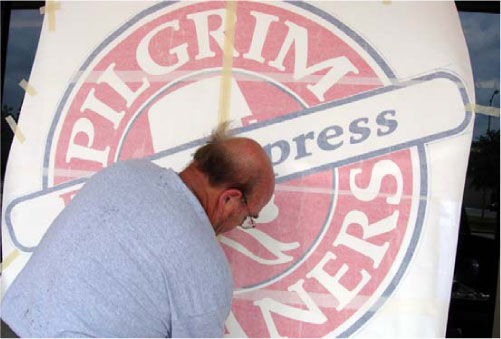
The next digitally printed logo will only cover two windows, so I simply centered it onto the third mullion and taped it securely. Next, I cut the print vertically on both sides of the mullion and taped those sections flat onto the window. I then created a center vertical hinge down the middle of each print taped to the window, and lifted each side up, cut away the backing sheet, sprayed some Rapid Tac onto the print , and smoothed them into place with the Velcro- Covered Squeegee. The 1.5” strip to cover the mullion was all that was left to do to complete the installation of the digitally printed logo.
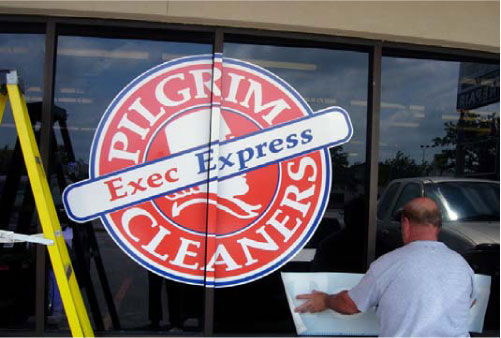
To complete this window project, I added the words “Join Today” to either side window. After removing the transfer paper and a final cleaning of all the windows with Windex, it was now time for the final photos.
This project turned out very nice. Once again I helped a valuable client by providing some effective “point of sale” marketing for his store, and I learned that old ways can be improved by using new methods, tools and techniques. Cut vinyl graphics have their place; however, digitally printed vinyl can dramatically improve the value of your project and save some valuable hours for you to use on the next project, or even your own “fun time”. Analyze every job. What is the best, most cost and time effective way to create your projects? Determine your methods and processes for quality, speed and effectiveness, and work daily to offer a better advertising product that you can produce with maximum efficiency.