
by Garrett Smawley, Roland DGA Technical Sales Manager – 3D & Education
The VersaUV LEF Series printers are a powerful line of products that are capable of printing high-quality, full-color graphics and stunning special effects on wide variety of materials. I’m continuously impressed by the versatility of these machines, and it seems like LEF users are always finding new and creative ways to direct-print on different types of substrates and objects.
However, after using and installing many of these printers, I’ve found that there are a few settings within the control panel that can be modified to make these devices even more user friendly, efficient, and forgiving when it comes to print production. The great part about these settings is they can be easily configured in user mode and adjusted as required.
Below, you will find information outlining these features and what they do, along with instructions on how to modify them from the control panel. By gaining a more complete understanding of these features, you’ll be able to better use the equipment settings, which will in turn improve the overall ease of use and efficiency of your LEF Series UV printer.
Units of Measurement:
As Roland DG Products are sold globally, the machines default to use Metric and Celsius units of measurement. If you’d like to set the units to Imperial and Fahrenheit, you can do so with the handy key sequence shown below. Start by turning off the sub power to the device. Then, hold “Menu” while turning on the “Sub Power.” The machine will then boot up asking which language, distance, and temperature units should be displayed. Use the up and down directional arrows to confirm the units of choice, then press the “Enter” button to confirm. Following unit selection, the machine will then proceed to initialize in user mode.
Menu + Sub Power
Enable Set at Setup:
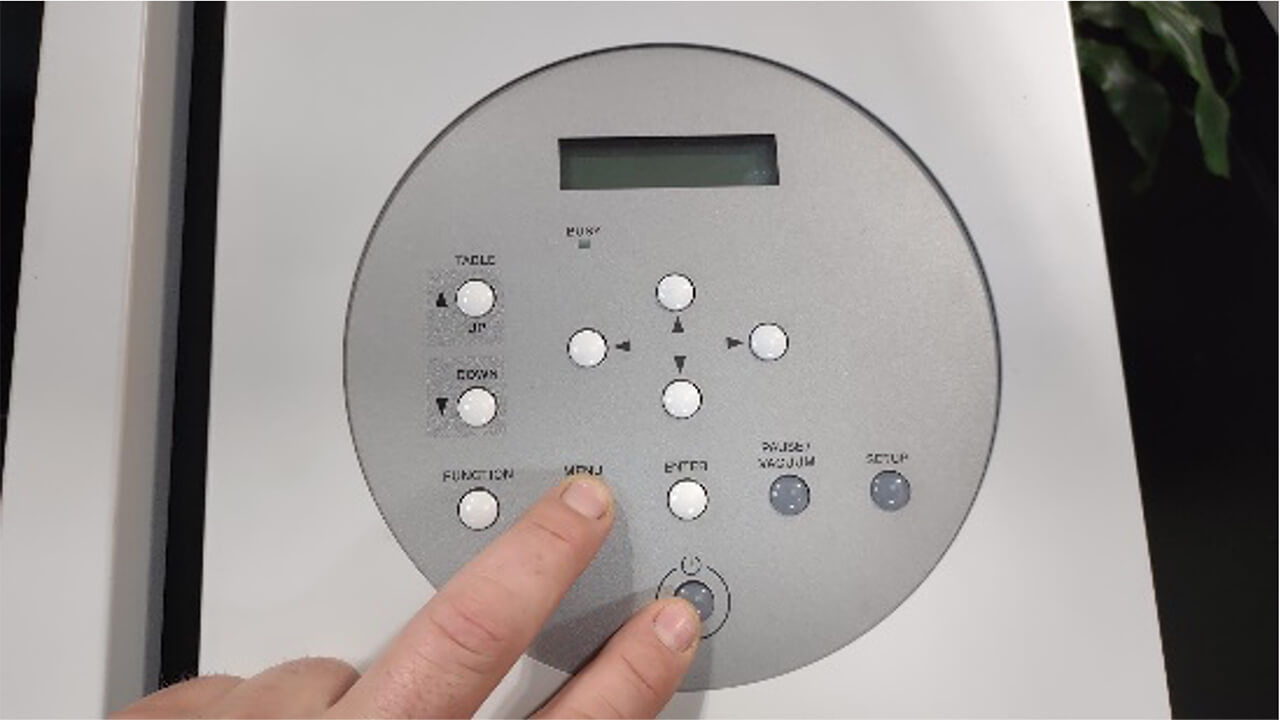
“Set at Setup” allows you to effectively crop the printable area to a desired location and size. This is particularly useful in simplifying the print positioning process. Because these machines are more commonly used commercially with printing fixtures, the setting is disabled by default. To enable “Set as Setup,” navigate to “Menu,” “Sub Menu,” and then the “Set at Setup” option. Use the directional arrows to enable the feature, then the “Enter” button to confirm.
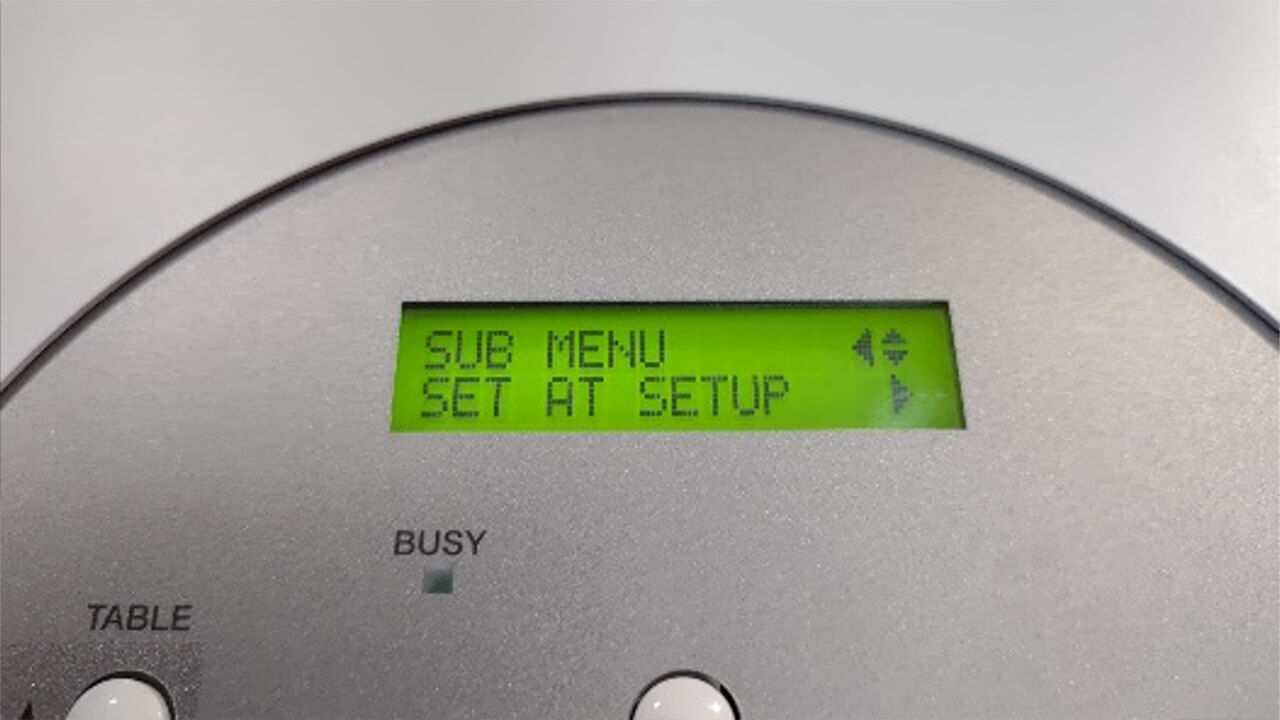
Menu → Sub Menu → Set at Setup → Enabled
Turn Off Full Width Scan:
“Full Width Scan” is a feature that defines how far the print carriage will travel in the X Axis during operation. By default, the scan width will be the full extent of the linear rail. However, this can also be set to only travel as far as the job page configured in VersaWorks, or only the extent of the given image that is being printed. By modifying this setting, you can economize the movement of the printer, which potentially improves print speed as well. To modify this setting, navigate to the “Sub Menu” and locate the “Full Width Scan” option. From there, use the directional keys to determine the appropriate scan setting. For the LEF Series UV printers, I recommend choosing the “Off” setting, which will result in the print carriage only traveling as far as needed over the page.
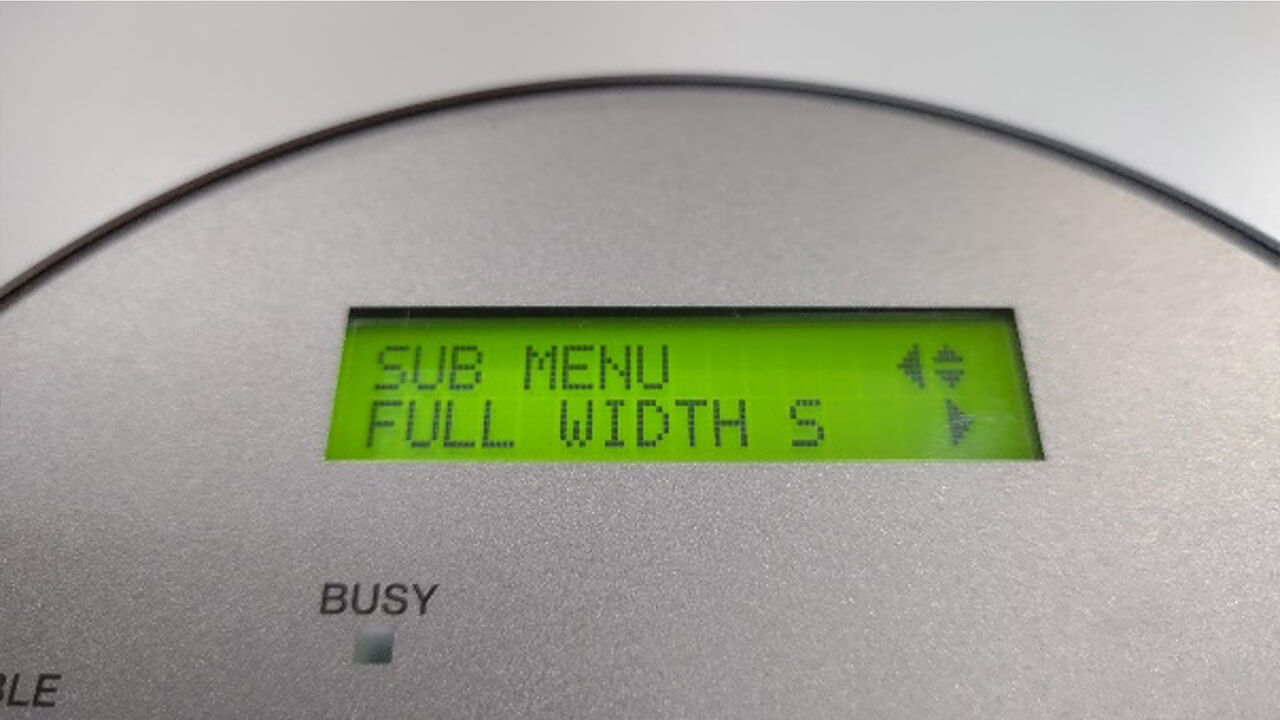
Menu → Sub Menu → Full Width Scan → On, Page, or Off
Enable Print Continue:
By default, the “Print Continue” is disabled upon start, which requires the operator to press the “Enter” key on the device to initialize the printing process. By enabling this feature, you will no longer have to release each job by interfacing with the machine each time. In other words, once you send the print job from VersaWorks, the printer will start printing. This is particularly useful for complex printing operations that may require multiple passes for White ink, color, and special effects. To enable this option, follow the steps below:
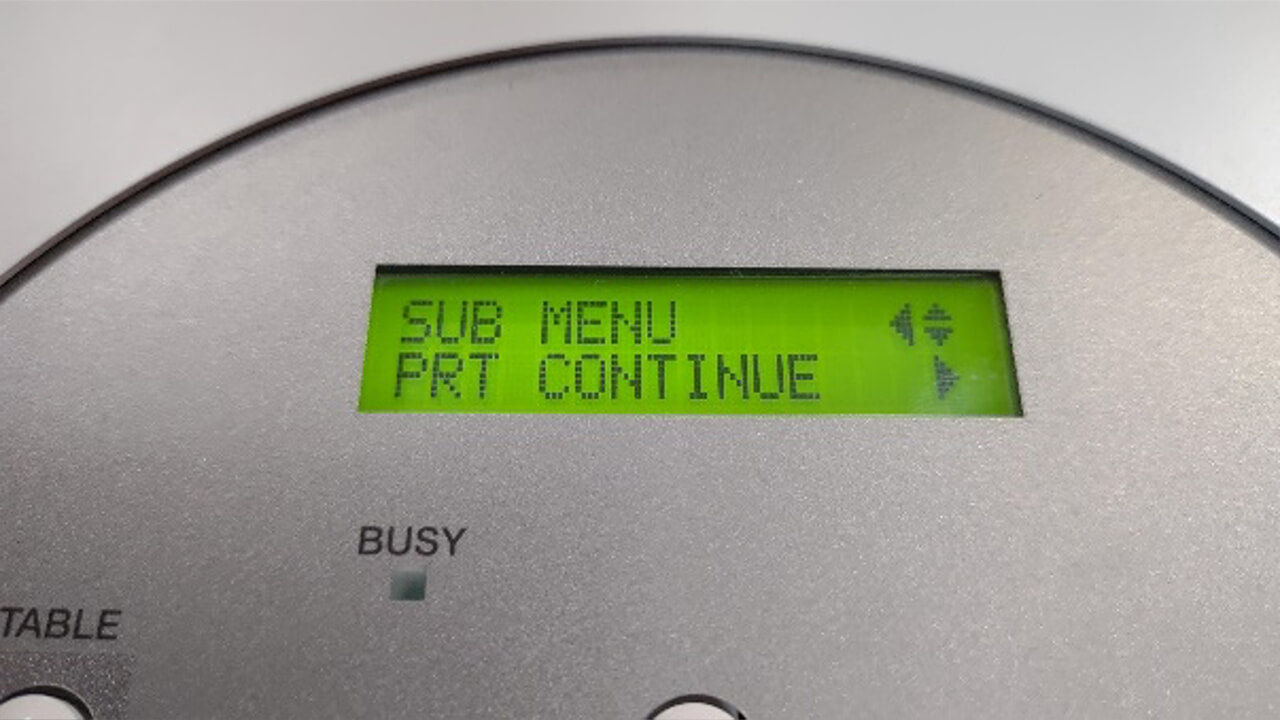
Menu → Sub Menu → Print Continue → Enable
Clearance Mode:
Lastly, “Clearance Mode” can be adjusted to automatically lower if your printing substrate strikes the media catch bar. By fault, if the media catch bar is struck during operation, the job is cancelled. Given that when this occurs, the print material is likely a job loss, I would much prefer the machine to automatically lower the bed and attempt to finish the print. To enable the readjustment of print height in the event of a media catch strike, navigate to the “Menu,” then “Sub Menu.” Locate the “Clearance Mode” option, then change the setting from “Cancel” to “Readjust.”
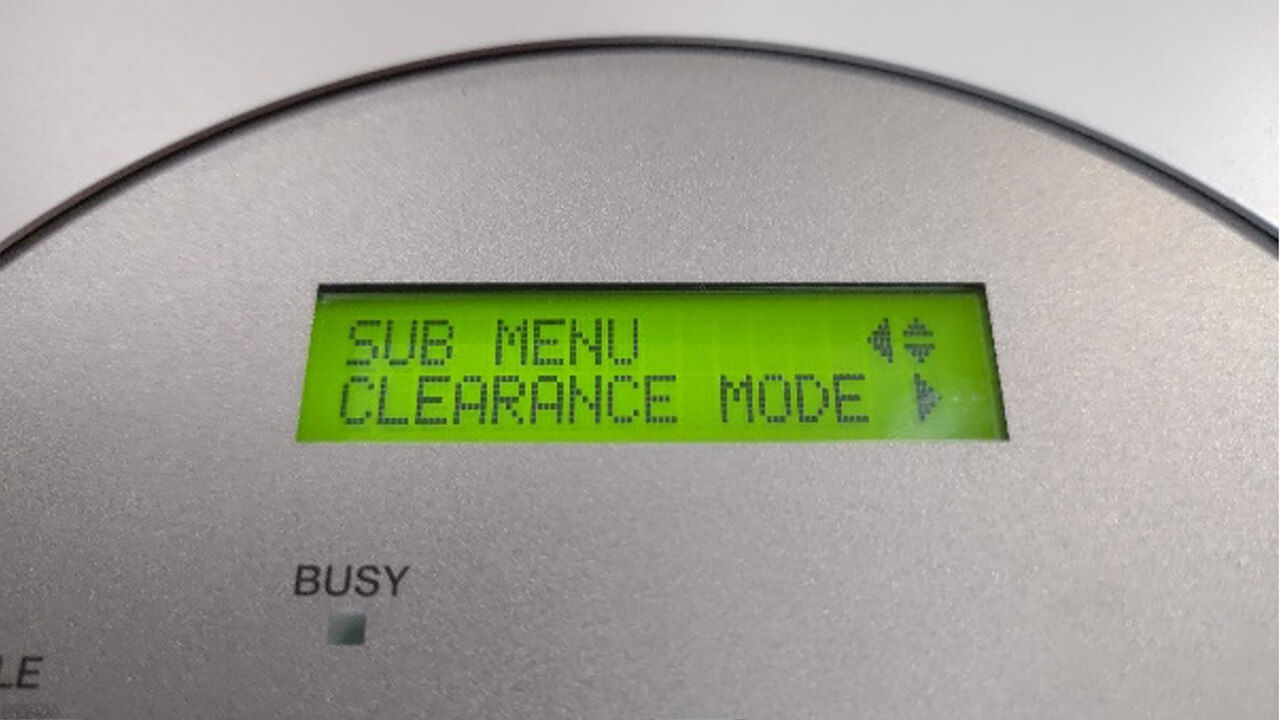
Menu → Sub Menu → Clearance Mode → Readjust
With these settings configured, you will find the LEF Series UV printers easier to use and more productive when it comes to print production.
